Showing posts with label Tasty Tuesday. Show all posts

Tuesday, October 22, 2013

Tasty Tuesday - Cheeseburger Paradise Soup

Bet you thought I was dead? Nope, just been sick and crazy busy. Well mostly sick and trying to keep my head above water. Your in luck for the rest of the week though. Be thankful.

It's soup weather. Thank goodness. Now my husband can't make fun of me for wanting soup when it's 95 outside. The weirdo.

Him.

Not me. I'm never weird.

Hey! What are asking him for?!?! He's biased.


I was in the mood for soup, and when I was figuring out what to fix for dinner this week, my husband saw this recipe and was reminded how incredibly awesome it was and that we needed to add it to the weekly lineup. So lucky you, I remember to take pictures (of most of it) and now you can enjoy this stuff too!

Soups on:


In a large saucepan, soup kettle, or cooking device. Lid optional.

Okay, anyway, in the pot add your potatoes, carrot, onion, green pepper, jalapeno, water, bouillon, garlic, salt, pepper, and cayenne pepper. Now, I am guessing that their idea of medium potatoes is different than my idea of medium potatoes, because by the time I threw everything in, the water didn't even cover everything. So, if your idea of medium potatoes is like my idea of medium potatoes, add enough water to cover everything. Just barely. The onions, carrots and peppers will add to the liquid. Trust me. I'm an expert.


Meanwhile, in a skillet, add some butter, beef, and mushrooms and cook until meat is no longer pink. If you need to drain, drain. Otherwise your soup will be greasy. Greasy soup is bad. Hopefully your burners don't suck as much as mine do and your potatoes will be done and you won't have to wait like I did. But when your potatoes get their act together, add in the beef mixture. But first - remember where you added more water? Does your potatoes seem awfully "watery"? If so, drain some out. Leave just enough to barely cover the potatoes and other veggies.

Trust me.

I'm an expert.

Then your going to forget to take pictures of the rest of the steps. But even though there are no pictures, that doesn't mean that you can ignore the rest of the steps, otherwise your soup will just be ingredients floating in potato and carrot flavored water.

Sounds.....atrocious.

Add the milk. Now remember, if you added additional water, you'll need to add additional milk. Otherwise it won't have the creamy texture that your looking for. You can substitute heavy cream or half and half to use less and still get the creamy-ness. I probably added about a cup extra of milk, but I added about 6ish extra cups of water.

Let everything bubble and boil and toil and....stew. In a small-ish bowl, add the flour and the remaining cup of milk. I left my flour the same and everything came out fine even with the additional liquid. Mix it all up until it's nice and creamy, and add it to the pot. Mix everything up and return to a boil. Let everything boil for a few minutes or until thickened. Now, your going to add cheese. Velveeta tends to help thicken, so don't get the soup so thick at this point that you forget that your adding Velveeta, otherwise your soup is going to become more like a casserole. So leave it a little runny, and start adding your Velveeta. It will continue to thicken.

Trust me.

I'm an expert.

Or don't trust me and live with runny soup. To run or not to run that is the question.

So just trust me. I'm an .... well you get the idea.

Once your Velveeta has been added and had the chance to melt and cover everything in its cheesy processed goodness, it's time to grab a bowl and a spoon. Top it off with some grated cheese, and the bacon and a few slices of green onion and inhale.


Note: If you make this the way I did, you'll have enough for several meals. For two of us it came out to about 4 meals...times 3. But that was my goal. Dinner now, and dinner again when it's close to finals and I'm too busy studying to care about cooking and then one more go round next semester. Just get it out of the freezer and let it defrost in the fridge overnight. Then you can either microwave it up, or stick in back in the pot and warm up that way. Either way works. Enjoy!


Hint: Want to print this easier? Just click on the title and print. You can keep what you need and what you don't.


Cheeseburger Paradise Soup

6 medium potatoes, peeled and cubed
1 carrot, grated
1 onion, chopped
1 green pepper, chopped
1/2 cup chopped seeded jalapeno pepper (about 2 peppers)
6 cups water
2 tbsp plus 2 tsp beef bouillon granules
3 garlic cloves, minced
1/4 tsp pepper
1/4 tsp salt
1/4 tsp cayenne pepper
2 pounds ground beef (or turkey)
1/2 pound sliced mushrooms
2 tbsp butter
6 cups milk divided
8 tbsp all purpose flour
1 (16 oz) Velveeta cheese, cubed
crumbled cooked bacon (optional)
grated cheddar cheese (optional)
diced green onions (optional)

1. In a large saucepan, combine the potatoes, carrots, onions, jalapeno, green pepper, water, beef bouillon, garlic, pepper, salt, and cayenne pepper; bring to a boil Reduce heat; cover and simmer for 15-20 minutes or until potatoes are tender.
2. Meanwhile, in a large skillet, cook beef and mushrooms in butter over medium heat until meat is no longer pink; drain well. Add to potato mixture. Stir in 5 cups of milk; heat through.
3. In a small bowl, whisk the flour and remaining milk until smooth; gradually stir into soup. Bring to a boil; cook and stir for 3-4 minutes or until thickened. Reduce heat; stir in cheese until melted. Garnish with bacon, cheese, and green onions if desired.

Tuesday, October 8, 2013

Tasty Tuesday - Magic Millionaire Pie

I love quick and easy. Homework, work, sewing, even cooking. Every now and then I just want something awesome to come together quickly.

That's exactly what this pie does. I call this a "dump" recipe, because you basically dump everything in one bowl and go. You can literally make this pie in under 5 minutes, then just put in the fridge to chill and viola! Instant dessert.

Its quick, it's easy, and the best part - it's amazing. My grandmother always requests this pie at all family gatherings when my mom asked to help. Always. I think that my grandmother things my mom slaves away hours to make this pie, it tastes that good. Most people don't believe that you can even make this, low sugar, low fat and still enjoy something this decadent. So are you ready to make one, punk? Well are you?

The stars of the show:

Graham cracker crust, vanilla pudding mix, crushed pineapple, sour cream, and whipped topping.
Like I said before, just dump. In a medium bowl, add the pudding mix and crushed pineapple. Straight from the box and the can. Don't drain or otherwise do anything. Give it a stir until the pudding and pineapple have became one. Now, dump the entire carton of sour cream in, now stir it all about and do the hokey pok....nevermind.


Stir until it's all mixed together. Now, here's the cool part. It's time for the magic. Say you need to make enough to feed 12 people. Obviously 1 pie isn't going to cut it, but never fear. Instead of the extra large crust that I used to make one pie, just split the ingredients between the two regular size crusts and top with their own tub of whipped topping and voila - 2 pies. Just want one pie, well, just dump it all in the extra large crust and - 1 large pie. See, magic.


Either way, dump the filling into the crust and top with whipped topping. Cover and refrigerate 2 hours or until set up. This pie really tastes the best when it can sit overnight and all the ingredients can really get acquainted.


Once the pie has set in the fridge for a few hours, cut it up and enjoy! Hopefully you have a trick to getting that darn graham cracker crust to stay together so your pie doesn't fall all apart. It might not be pretty, but it sure makes up for the ugliness with it's awesomeness. And as long as you get it all mixed up, you can't tell there is a drop of sour cream in it. It's sneaky and magic.


Millionaire Pie

1 box vanilla instant pudding
1 (16 oz) container sour cream
1 (8 oz) crushed pineapple
1 (8 oz) whipped topping*
1 large graham cracker pie crust*

In a large bowl, combine pudding mix and crushed pineapple; stir until pudding is dissolved. Fold in sour cream and stir until well combined. Pour into graham cracker pie crust (or divide if making 2 pies). Top with whipped topping. Refrigerate for 2 hours or overnight until set.

Note: You can make 2 pies instead of one. If you get the small crust you can make 2 pies, the extra serving pie will allow you to make one pie, but you will need 2 tubs of whipped topping, one for each pie.

Tuesday, October 1, 2013

Tasty Tuesday - Pink Velvet Cupcakes with White Chocolate Ganache

Ganache. It's like a secret code word for heavenly. Pink - I'm a girl, it's a rule. So I stumbled across this recipe about a year ago, and I've never made it, until now. But it's haunted me. I've dreamed about it. Then one day, I hunted the recipe down, and proceeded the hunt for the pink paste food coloring.


The culprits of the yummy goodness:

Butter, Vanilla, Sugar, Flour, Baking Soda, Baking Powder, Eggs, Salt, Buttermilk, Heavy Cream and White Chocolate
 In a bowl, add the sugar, butter and food coloring. If you want to get creative, you can use some other color, as this stuff doesn't change the taste. Beat until light and fluffy. Add in the eggs, one at a time. And toss in the vanilla.

Now, you can be lazy like me, and add our salt, baking powder, and baking soda to the bowl your working in. That way you can just scoop the flour out of the canister and avoid washing an extra bowl. Or you can follow the directions and mix all that stuff in a separate bowl. Whatever floats your boat.


Now, add in the flour and the buttermilk alternately. Don't have buttermilk on hand, or don't want to buy it. Then just measure out your milk, and add a "splash" or about a 1 tsp to the milk. Let it sit, until it's thick and creamy. Viola! Instant buttermilk.

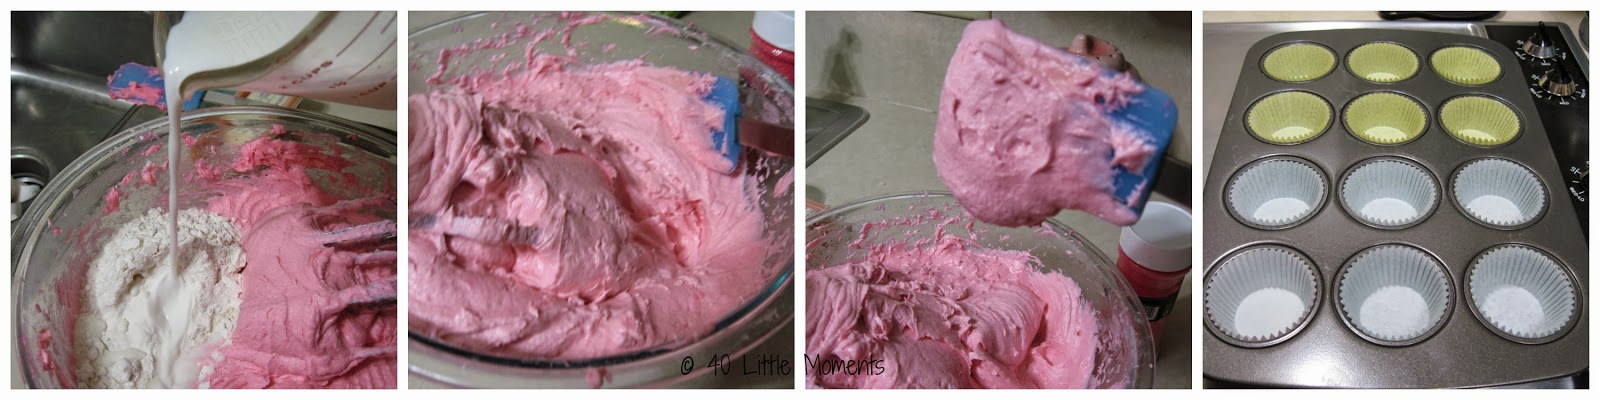
This is a fairly thick batter. Now...this is the most important step. Taste the batter. Don't look at me like that. Taste it. I was worried that the thickness meant I had done something wrong. So I tasted. Hmmm. It's okay. How disappointing. So in order to improve, I threw in some extra vanilla. And see that pink. That's the color I wanted after I added all the "white" remaining ingredients. You can always add more if you want to go darker.

Line your muffin tin. Sounds like an Army command. Line your tin soldier! Sir, Yes, Sir!


Get your batter in the tin. If you have a handy cupcakie - filler-upper then use it. Or an empty ketchup bottle works too. Just get the batter in the tins! Yes, Ma'am!


Now, you put them in the oven and turn yourself about and realize that your sink is full of dishes and that your too old to hokey pokey in your kitchen with a dog, and you discover that's what it's all about. It's been a long day.

Bake them cupcakes soldier. 25-27 minutes or until slightly golden and you poke a stick in them and the stick is still nice and clean. Then put the toothpick back in the container...think of it as recycling. Once the cupcakes are done, let them cool in the pan for about 10 minutes. Then remove them and let them cool completely. Probably on wire racks, but if your like me and don't own wire racks, then just let them cool on your counter. You'll want them completely cool to ice them.

To make the Ganache. In a saucepan add your heavy cream. Bring it to a boil. Don't think, "Oh, I'll go do (insert activity here) and come back and check on the cream in a second. It's a trick. Don't do it.

There isn't much cream to start with, so it doesn't take long to bowl. I was washing the muffin tins and turned around it and it was boiling. It's fast. Pour over the chocolate and whisk until smooth. Then add in the butter, and keep whisking. You want it lump free. Now, taste it. Go on, you know you want to. Did you hear the angels sing too?

Now, the hard part, stick the ganache in the fridge. You'll want to leave it about 30 minutes, and try to remember to come by and stir it about half way through. If you happen to leave it in longer than that, just let it sit out and warm up some. I left mine in about an hour and just let it sit out and then you whip it. And whip it good. Soft peaks is what your looking for. It takes a bit, but not near as long as making whipped cream. Then frost those cuppycakes and decorate to your hearts content. 


Then pour yourself a nice big glass of milk and take a bite out of a mini piece of taste bud heaven. Then hide the rest, because you probably won't want to share. 


Pink Velvet Cupcakes with White Chocolate Ganache

1 cup butter, softened
1 1/4 cups sugar
1/8 tsp pink paste food coloring
3 eggs
1 tsp vanilla
2 1/2 cups all purpose flour
1 1/2 tsp baking powder
1/4 tsp baking soda
1/4 tsp salt
1 cup buttermilk

For the Ganache:

2 cups white baking chips
1/2 cup heavy cream
1 tbsp butter
pink coarse sugar and pink sugar pearls (optional)

In a large bowl, cream the butter and sugar until light and fluffy. Add the food coloring and mix until incorporated. (You can add more color here if you aren't happy with your level of "pink". You still have lots of white stuff to add, so your color will be lighter than what you see right now.) Add eggs, one at a time and mixing well. Finally, add in the vanilla. In a separate bowl combine the flour, baking powder, baking soda and salt. Add to the egg mixture alternately with buttermilk, mixing well after each addition.

Fill paper lined muffin cups. (The batter is fairly dense, so I did 3/4 of the way full and they came out fine.) Bake at 350* for 20-25 minutes or until slightly golden and a toothpick inserted near the center comes out clean. Cool in pans for 10 minutes, then remove to racks to cool completely.

Place white chips in a large bowl. In a saucepan, add the heavy cream and bring to a boil. Pour over white chips and stir until completely melted. Add in butter and continue to stir until incorporated. Chill for 30 minutes, stirring once.

Once chilled, beat on high until soft peaks form and frosting is light and fluffy. Frost cupcakes, and decorate with pink sugar and sugar pearls if desired. Store leftovers in refrigerator.

Makes 2 dozen

Inspired by Taste of Home

Tuesday, September 24, 2013

Tasty Tuesday - Sausage, Beans and Rice

See, I cook stuff besides tortes and pudding. When my dad had his heart attacks we began to hunt up recipes that were healthier options than the original counterparts. And as much as we love our red beans and rice, the boxed mix that he was so fond of has enough salt to scare even me. So when I stumbled across this Sausage, Beans and Rice recipe, I knew that it was a must try. And even though my picky father won't eat it (he'd rather have the salt lick original)...the rest of us love it. What does he know anyway?


It's amazing, and so easily adaptable. Want more spice - use jalapeno sausage. Want it less sweet - use less brown sugar. Want it more tomatoey - add more ketchup. Want it with white rice - knock yourself out. It's very adaptable to suit your mood. Or your preferences. Becaue let's face it, I don't make anything by the recipe except once, then after that it's game on.

The cast of characters:


Chop that onion! Chop Chop! Add the bell pepper and onion to a skillet with the oil. You want to soften the veggies, but only slightly as this will cook in the oven and you don't want to turn them to mush. Meanwhile, drain the beans and rinse them off.


See, just soften. Now, add the beans, the brown sugar, the ketchup, the Dijon mustard, the corn syrup, the sausage and give it a good stir. Add the rice and the broth and stir around. Give everyone a chance to meet and make friends.


After everyone has became acquainted, pour everything into a 9x13 pan. Cover with foil and set the timer for 15 minutes. Come back and take the foil off and give everything a good stir and let it go until the rice is tender.


 Then enjoy. With broccoli. Or without. You know. Because your making this and you might not like broccoli. But I heart broccoli. And Cauliflower. And...nevermind.


Now go forth and make this for your family. They will thank you for it. There will be applause and cheers of joy. Enjoy!


Sausage, Beans and Rice

2/3 cup chopped onion
1/2 cup chopped green pepper
1 tsp minced garlic
1 tsp olive oil
1 pound smoked sausage, cut into 1/4" slices
1 can (16 oz) kidney beans, rinsed and drained
1 can (15.5 oz) great northern beans, rinsed and drained
1 cup instant brown rice
1 cup chicken broth
1/4 cup packed brown sugar
1/4 cup ketchup
1 tbsp. corn syrup
1 tbsp. Dijon mustard

Preheat oven to 350*. In a large skillet, saute the onions, green peppers, and garlic in oil until slightly tender. Add the remaining ingredients. Pour into a greased 13x9 baking dish.

Cover and bake at 350* for 15 minutes. Uncover, bake 10-15 minutes longer or until all liquid is absorbed and the rice is tender.

Tuesday, September 17, 2013

Tasty Tuesday - Knock Your Socks Off Banana Pudding

My grandmother was famous for her baking skills. She was an amazing cook. However, she was notorious for taking a recipe and making it completely different that what the directions called for. So now that she is gone, my mom and I play mad scientists with some of her recipes in order to go from her "notes" (I use that term loosely) to decipher how to make some of the things that I grew up with.


This banana pudding is unlike any you've ever had. It's thick and creamy, and frankly it's just plain awesome!  It's a little bit more prep than the Jell-O kind, but it's worth every moment that it takes to make it. I think my husband would have proposed on the spot, had I made this on our first date. It's that good. However, in re-creating this the first time we discovered that her recipe makes enough to share. With several people. So when you get to the recipe I've included directions for both ways. Even if you are feeding a crowd (6-10 people) the 1 recipe is sufficient. Make 2 at your own risk.

Let's get started!

Meet the contenders:
And in this corner we have Milk, Eggs, Butter and Sugar. In the opposing corner we have banana's flour and cookies.

Ding! Ding! Ding! Let's get ready to beeeeeeeaaaaaaaattttttt!!!

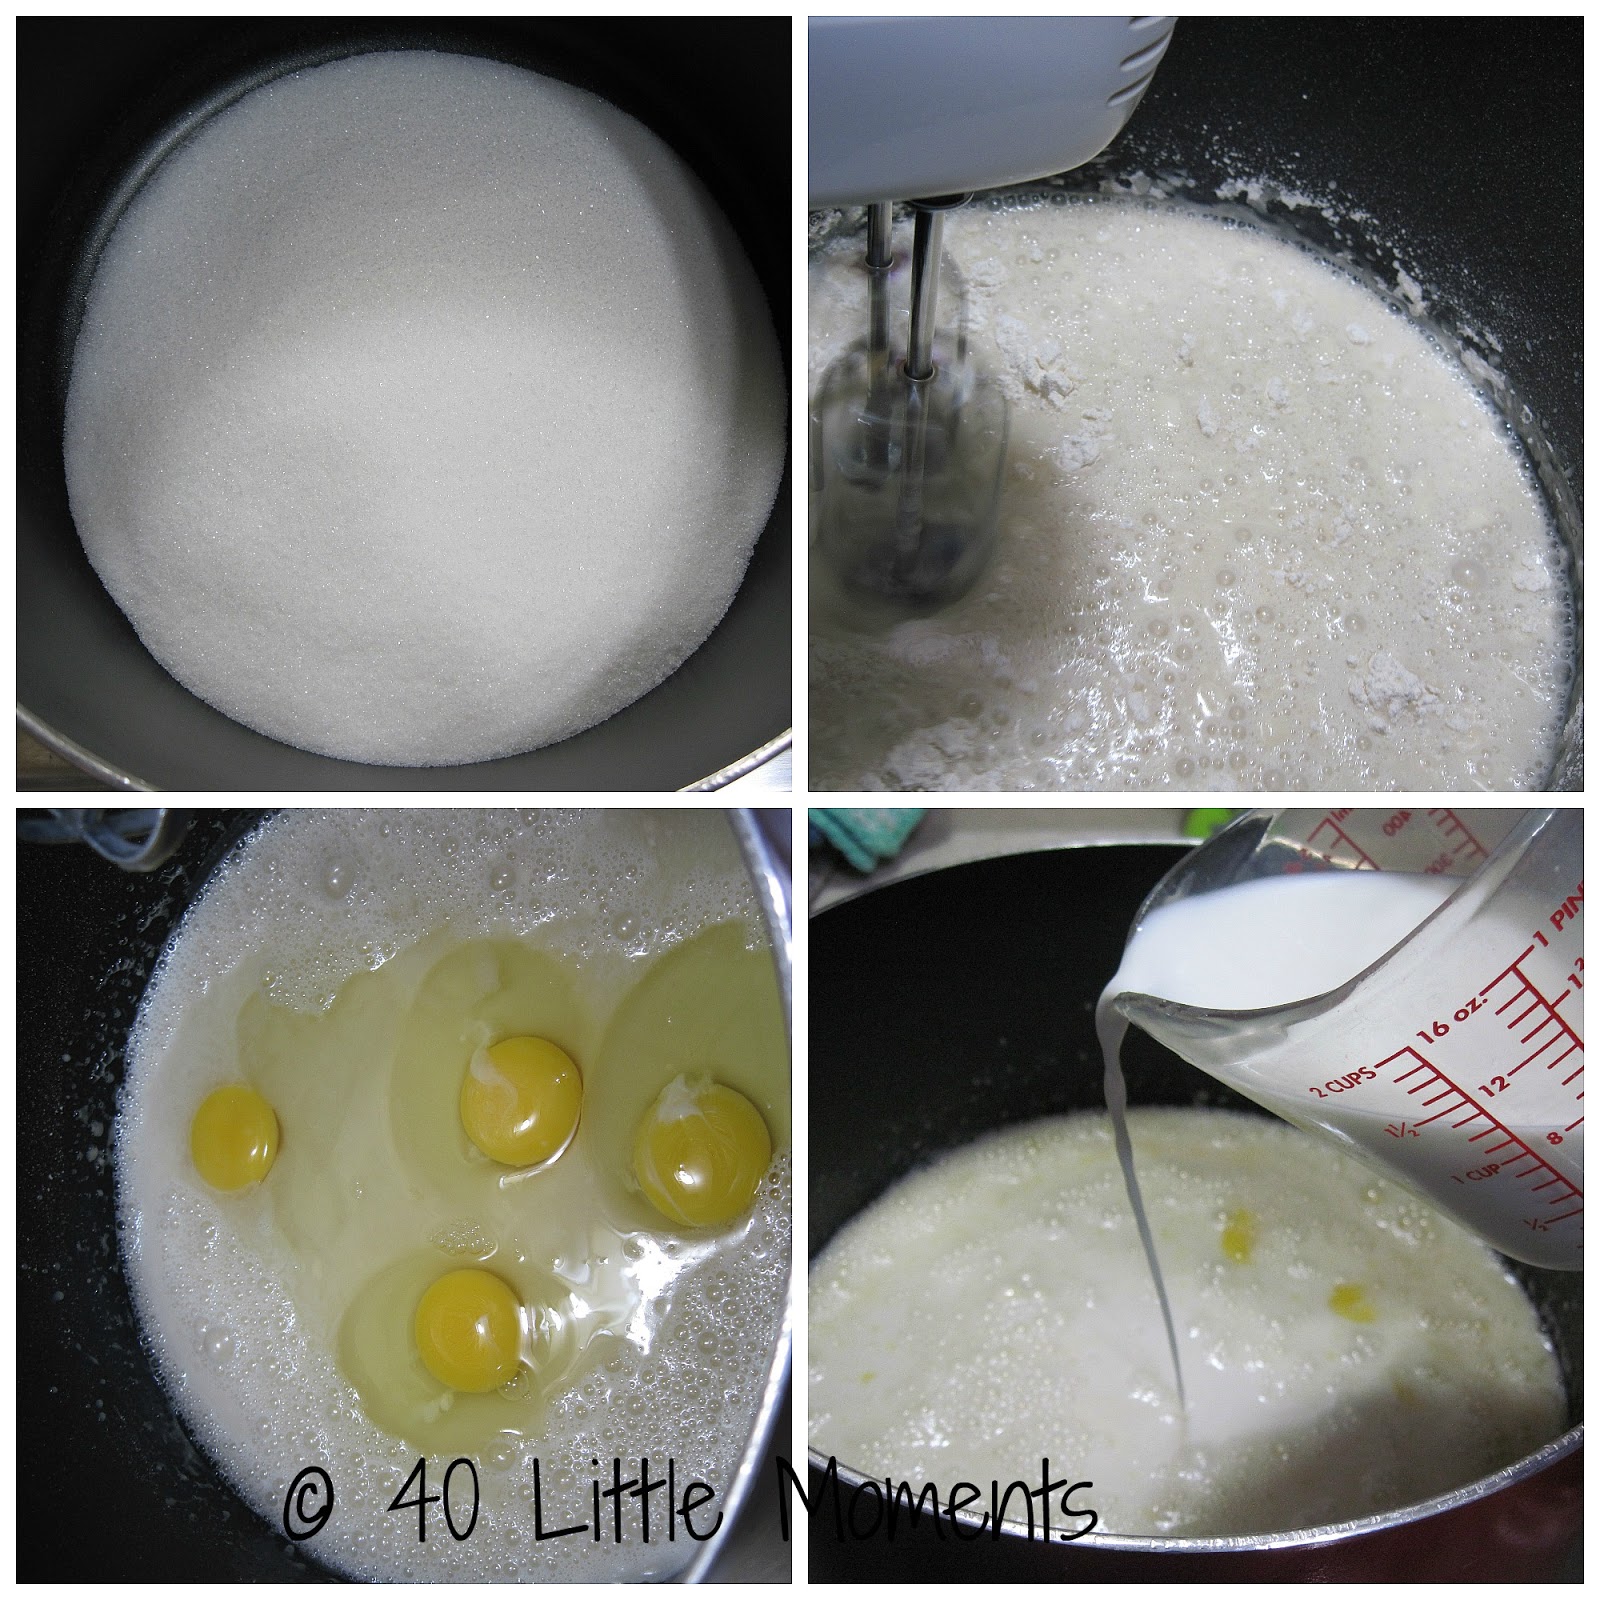
I know what I'm about to tell you sounds weird. But trust me...it works. Put 1/2 the milk and all of the sugar in a saucepan. Preferably one that you don't mind using your mixer in. Then your gonna beat it. And beat it, and beat it some more. Then add your flour. And beat.Try and get your flour incorporated so that there are no lumps.
Sugar rush!
Then add the eggs. And beat. Are you tired of beating yet? Recruit some help! Add the remaining milk and beat. Don't worry. Your beating is almost over. Now you get to stir. You're welcome

Get your egg, sugar, milk mixture hot. Not boiling yet. But hot. Then drop your butter in. You can cut it up, or you can just dump it in and stir it around until it melts.


Stir, beat. Stir beat. This is an anger eliminating dish.
Your going to want to keep stirring and scraping the sides and the bottom until the mixture is thick. It will thicken some when you remove it from the heat, but not by much. So don't think that it will be okay once it thickens. You will want it thicker than gravy. See how it sticks to the scraper that I'm using? You'll want it thick. You'll also want to make sure it's lump free. If it's lumpy. Add some butter and beat it on high with your beater. Sometimes you don't even have to add the butter, if it's not too lumpy. 

Now to assemble. You can make one giant bowl or you can make individual bowls in ramekins or other dessert dishes. Just add your cookies to the bottom of the dish. Then cover with the pudding.


Add a cookie layer. A pudding layer. A banana layer. A cookie layer. A pudding layer.

Grab your banana's. First drop a banana on the floor. Then see if the dog will eat it. She won't. So toss it and attempt to peel a banana again and hope you don't drop this one too. Add a layer of banana's to your bowl. 

Drop banana. Attempt to feed banana to dog. Fail. Get new banana. Continue forth.

Then you just keep layering pudding, cookies and banana's until you run out. Then you tell your husband to make them pretty for pictures and he does this. 


Happy Pudding
You can eat this warm or cold. We usually have a little bit warm and enjoy the rest cold. It's good either way. This pudding is amazing and your going to see it appear in a few other Tasty Tuesday's, so you might as well make it now and enjoy. Then go walk 12 miles to burn off the calories. It's got banana's therefore it's healthy, right?!


Yummy. Yummy.

Knock Your Socks Off Banana Pudding

For 1
3 cups sugar
1 cup flour
4 cups milk
4 eggs
1 1/4 sticks butter

for 2
5 cups sugar
1 1/2 cups flour
8 cups whole milk
7 eggs
2 sticks of butter

4-5 banana's add or subtract based on your preference
for 1 pudding 1 box of Nilla wafers 2 boxes for 2.
Optional whipped cream

In a large saucepan place 1/2 of the milk. Add the sugar and flour. Beat until mixed. Add eggs, beat well. Add the rest of the milk and butter continuing to stir until thickened. If lumpy, remove from heat and beat. If severely lumpy add a stick of butter and beat while hot.

In the bottom of your serving dish place a layer of cookies. Add enough pudding to cover. Add a layer of sliced banana's and another layer of cookies. Cover with pudding and repeat until all remaining ingredients are used. Top with whipped cream if desired.


Tuesday, September 10, 2013

Tasty Tuesday - The Case of the Disappearing Strawberry Walnut Torte

I love summer. The awesome fruits and vegetables that are in season. Peaches, cherries, grapes, apricots, and strawberries. Okra and squash, oh my!!

I usually eat several cases of strawberries each year. They are awesome all alone, or with whipped cream. So when I stumbled across a recipe for a torte, I knew the addition of strawberries would make this an awesome experience.

And awesome it was. The heavens opened up and the angels rejoiced.  Until I discovered a pile of dishes to wash. Baking can get so...dirty.


Strawberry Walnut Torte - Awesomeness!
The list of suspects:


Strawberries, Vanilla, Walnuts, Strawberry Preserves, Eggs, Cream Cheese, baking powder, salt, heavy cream, flour and sugar.


Crank up the fire. We want to bake those suspects! 350* should do it. Grab some parchment paper, and line those pans, then spray and lightly flour (or use Baker's Joy) to make the suspects easy to remove. Toast your nuts. Toast them until they are lightly toasted and nutty smelling. Your kitchen should smell like you have stumbled into a walnut farm.

Beat your whipped cream. To make things go faster, freeze your bowl and your beaters before hand, but you can be like me and whip your cream until the cows come home because you forgot this handy dandy time saver.

Make sure you get stiff peaks. Not wimpy peaks. You want to beat in into submission...or you know....stiff peaks.


Wimpy! Wimpy Wimpy!                          Stiff  Stuff!

In another bowl, beat the eggs and the sugar (and attempt to make a face with the eggs and said sugar). Add vanilla and beat. In another bowl add the rest of your dry ingredients. Fold the egg mixture alternately into the dry ingredients with the whipped cream. Pour into the prepared pans. Mixture is fairly thick, don't panic, it will all work out in the end.


For frosting: beat cream until stiff peaks form. Beat the cream cheese, sugar, vanilla, and salt until all mixed together. Make them become friends. Beat them into submission. Fold in the whipped cream. Using a long knife, or dental floss, or whatever tool you think might cut the cake in half without causing you to weep.

Place a cake layer on a serving plate; spread with 1/2 cup of frosting. Add a layer. Top with whipped cream and half of the preserves. Then wash, rinse, repeat. Without the washing and rinsing.


Frost the rest of the cake. Arrange the strawberries over the top. And if you had way too many like I did, arrange them on the sides, on the bottom, the top, pretty much everywhere they will stick. Then those preserves you saved, well melt them in the microwave and brush them over the top of the strawberries. It makes a glaze and it just adds an extra layer of strawberry yumminess.

Poke the whole thing in the fridge until your ready to serve. Make sure you let everything set up some before you serve it, as the longer it sits out the more....melty it becomes. Then it becomes more like a strawberry pudding with cake. I let it sit out while I took the pictures and taste tested the awesomeness and it wasn't pretty.

Enjoy!


Strawberry Walnut Torte

3/4 cup chopped walnuts, toasted and cooled
1/4 cup plus 1 1/4 cups sugar, divided
1 1/2 cups heavy whipping cream
3 eggs
3 tsp vanilla extract
1 3/4 cups all purpose flour
2 tsp baking powder
1/2 tsp salt

FROSTING:
1 1/2 cups heavy whipping cream
1 pkg. (8 oz) cream cheese, softened
1 cup sugar
1 tsp vanilla extract
1/8 tsp salt
1 jar (12 oz) strawberry preserves
4 cups halved fresh strawberries

Crank up the fire to 350*. Line the bottom of two 9 inch round baking pans with parchment paper; grease and flour paper. Add the walnuts and 1/4 cup sugar into a food processor; pulse until nuts are ground and crumb like. In a small bowl, beat cream until stiff peaks form. (Hint: For less beating time, place bowl and beaters in freezer and then whip!) Set aside.

In another bowl, beat the eggs and remaining sugar until thick and lemon colored; add vanilla. In another bowl, mix the flour, baking powder, salt, and walnut concoction. Fold into egg mixture alternately with whipped cream.

Divide the batter between the two pans. Bake at 350* for 25-30 minutes or until a toothpick inserted comes out clean. Cool in pans for about 10 minutes, then remove the paper and place on wire racks. Let the torte's cool completely.

To make the frosting: in a small bowl, beat cream until stiff peaks form. In a large bowl, beat the cream cheese, sugar, vanilla and salt until blended. Fold in the whipped cream.

Using a long serrated knife (or dental floss), cut each cake horizontally in half. Place one layer on a serving plate; spread with 1/2 cup frosting . Top with a second cake layer. Save 2-3 tbsp. preserves for later. Spread half of the preserves on top of cake, but leave a 1/2 inch area around the edge bare. Repeat the layers.

Frost the sides of the cake with the remaining frosting. Arrange the strawberries over the top of the cake. In the microwave, melt the reserved preserves (10 second intervals and stir until glaze like consistency), brush over the strawberries. Refrigerate until serving.

Note: don't leave setting out for too long, as the frosting starts to "melt" and things get interesting.

Enjoy!